|
| From her inception in 1955 to her build and original launch in 1959 she has undergone many changes and repairs. With those changes and repairs come the secrets that she keeps. In spite of what we discovered, she kept us safe on our voyage from Kent Narrows MD, to Albany NY which included an Atlantic Ocean passage. We rewarded her with some much needed love and attention. |
We had chosen Scarano Boat Building for a reason.
With Tropical Horizons II hauled out and blocked up in the yard at Scarano's in Albany NY, work started with pressure washing the hull. Once that was completed, the next step was to determine what lurked beneath the surface. The trick with a steel hull is that you really need to sandblast the hull in order to see what is going on and what the audio gauge tests have revealed, although those tests will only give you an idea of where problems may exist. The work detailed in this post took place between October of 2020 and is currently still in progress as of this post. All of the photos provided were from project managers and yard workers at Scarano Boat Builders. This is not for the faint of heart!
To start with, here is a short list of the work we wanted done on Tropical Horizons II throughout the winter:
1- Clean and sandblast the hull below the waterline and repair all areas in need of re-plating.
2- Chip away and sand the areas above the waterline where rust was originating.
3- Fabricate a new anchor roller system to accommodate the new Rocna Anchor.
4- Touch up paint on repaired locations above the waterline and blend in with existing topside paint.
5- Re-paint and seal the exposed steel below the waterline and re-apply antifouling paint.
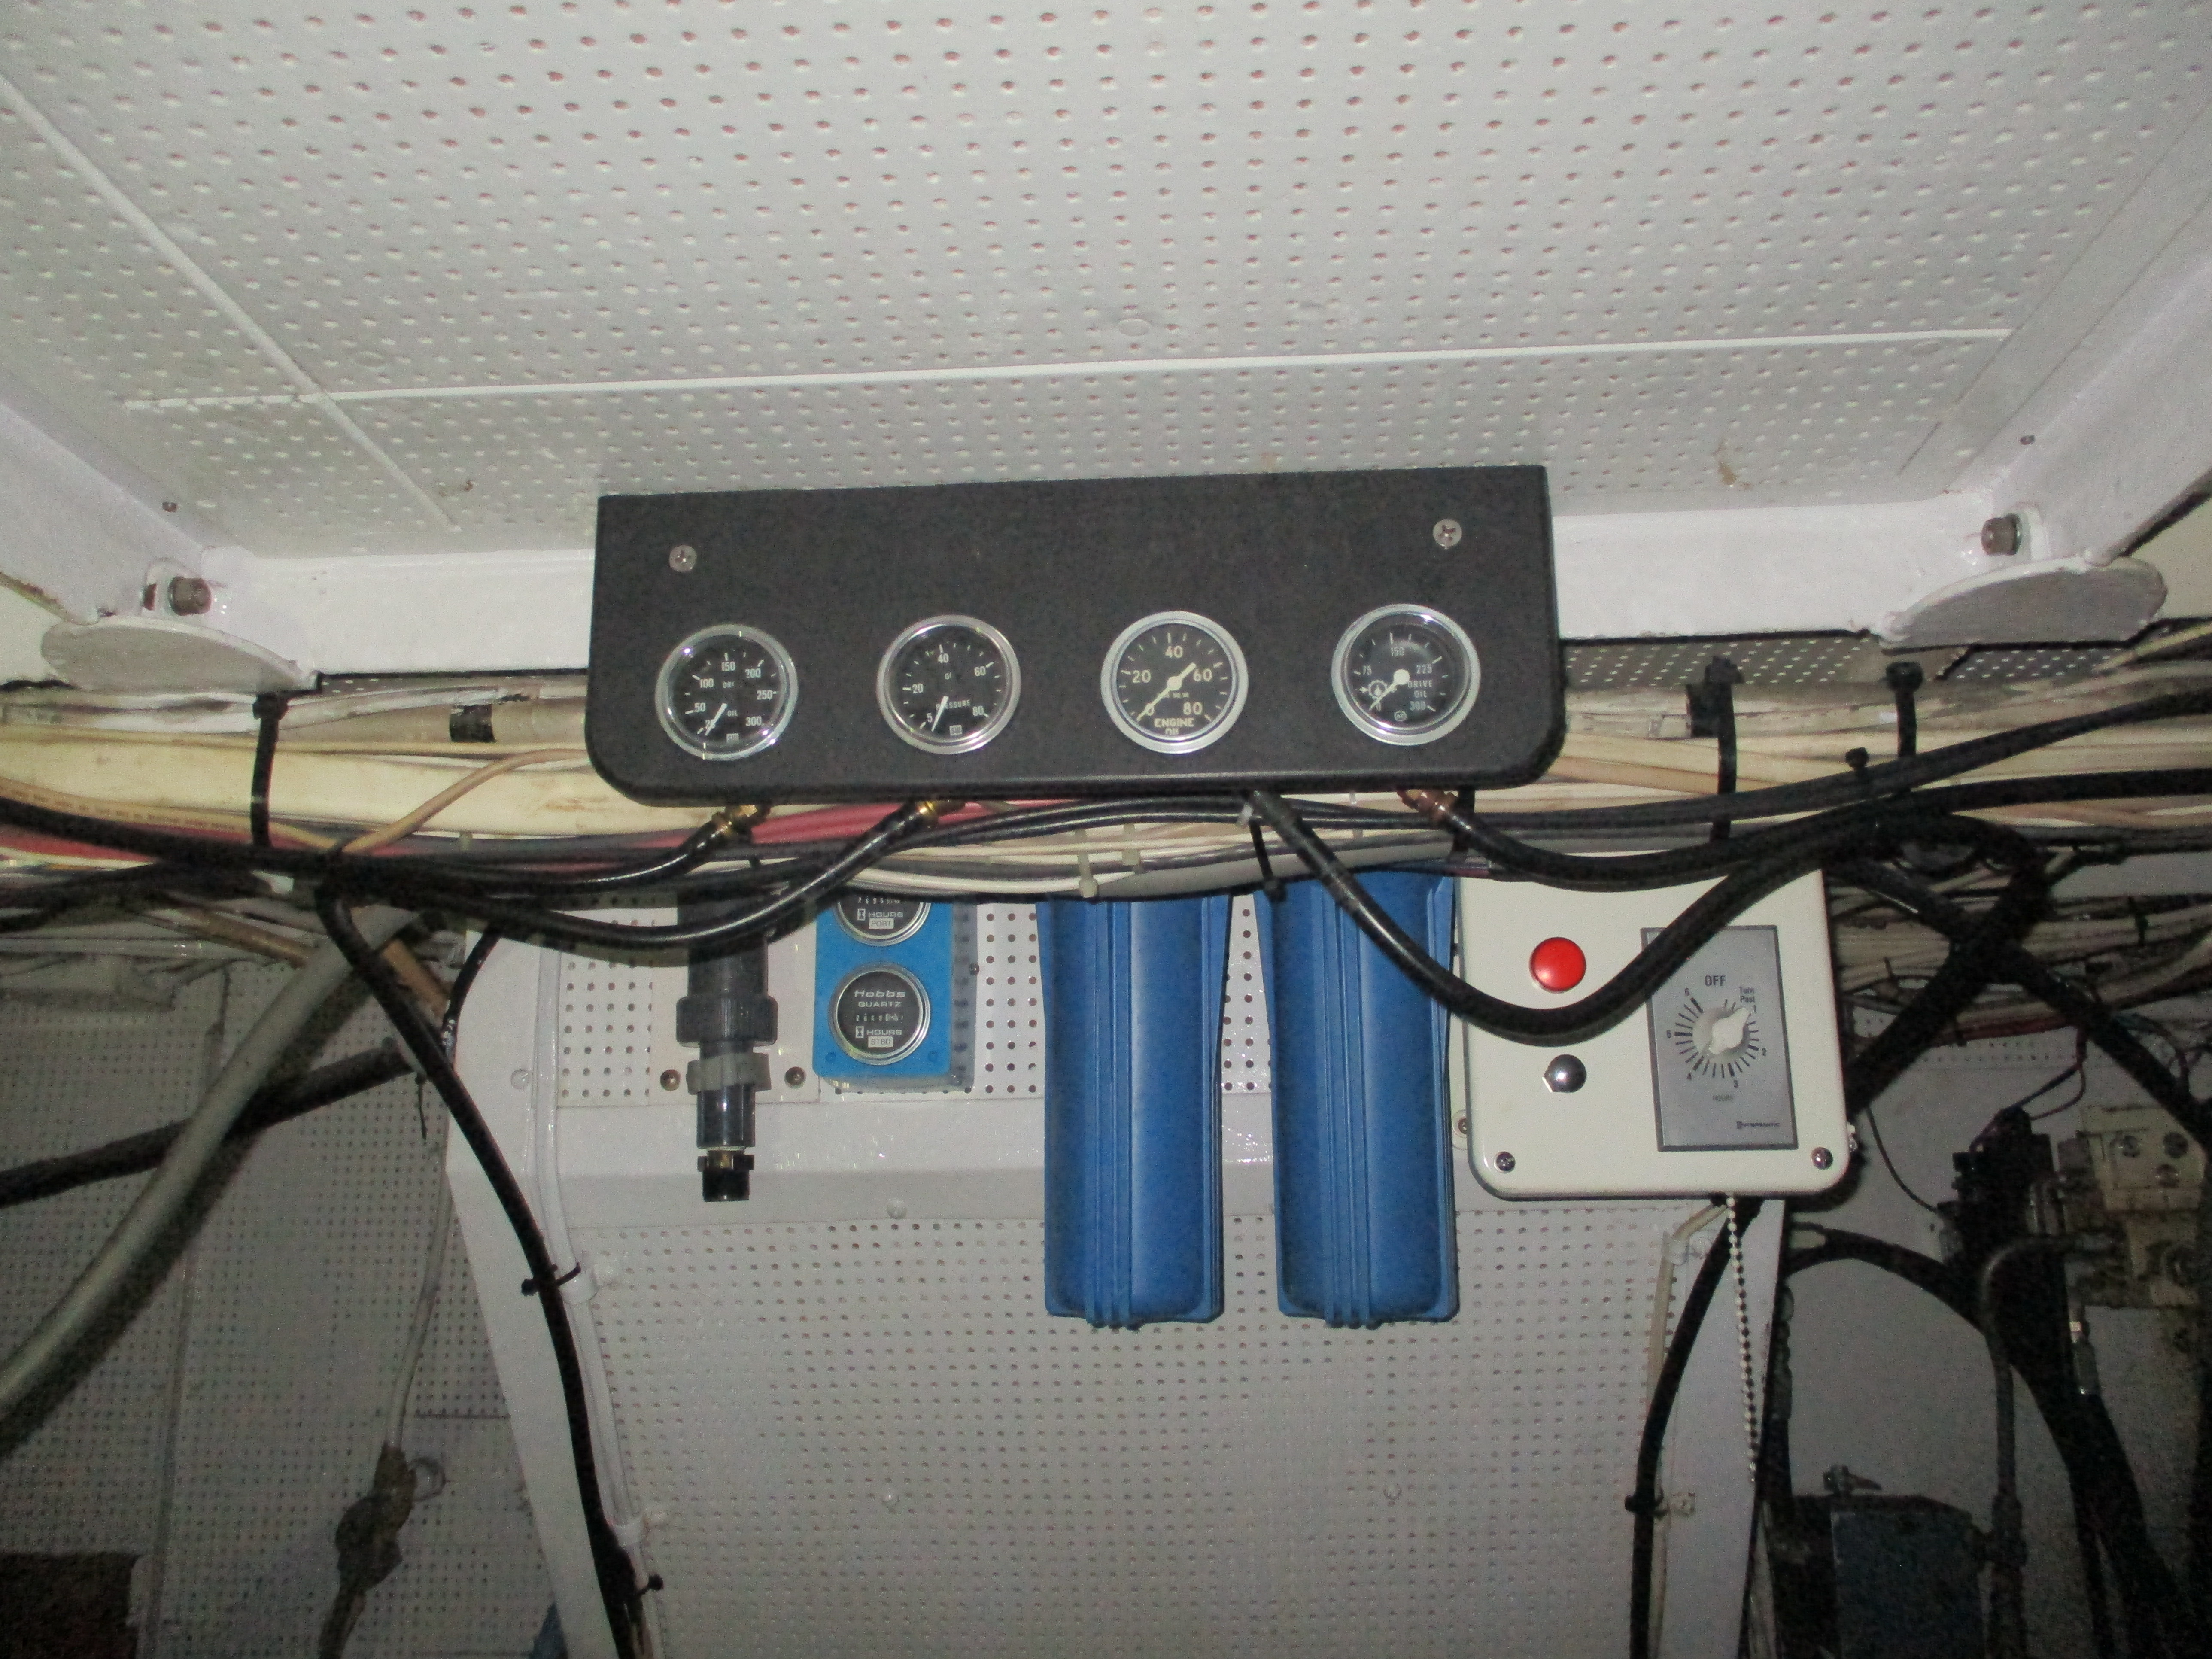
6- Replace the mechanical engine and drive oil pressure gauges with electric ones, install the mechanical ones in the engine room with shutoffs in case of an oil line failure.
Needless to say that list expanded somewhat... Tropical Horizons II revealed her secrets to us!
 |
| Sandblasting begins and...holes in the hull show up, along with lead paint! |
 |
| There were the creatively sealed holes in the hull! This was a putty patch and not the only one! |
 |
| This started off as "surface rust" |
 |
| Another hole! |
 |
| and another. |
 |
| and two more... |
 |
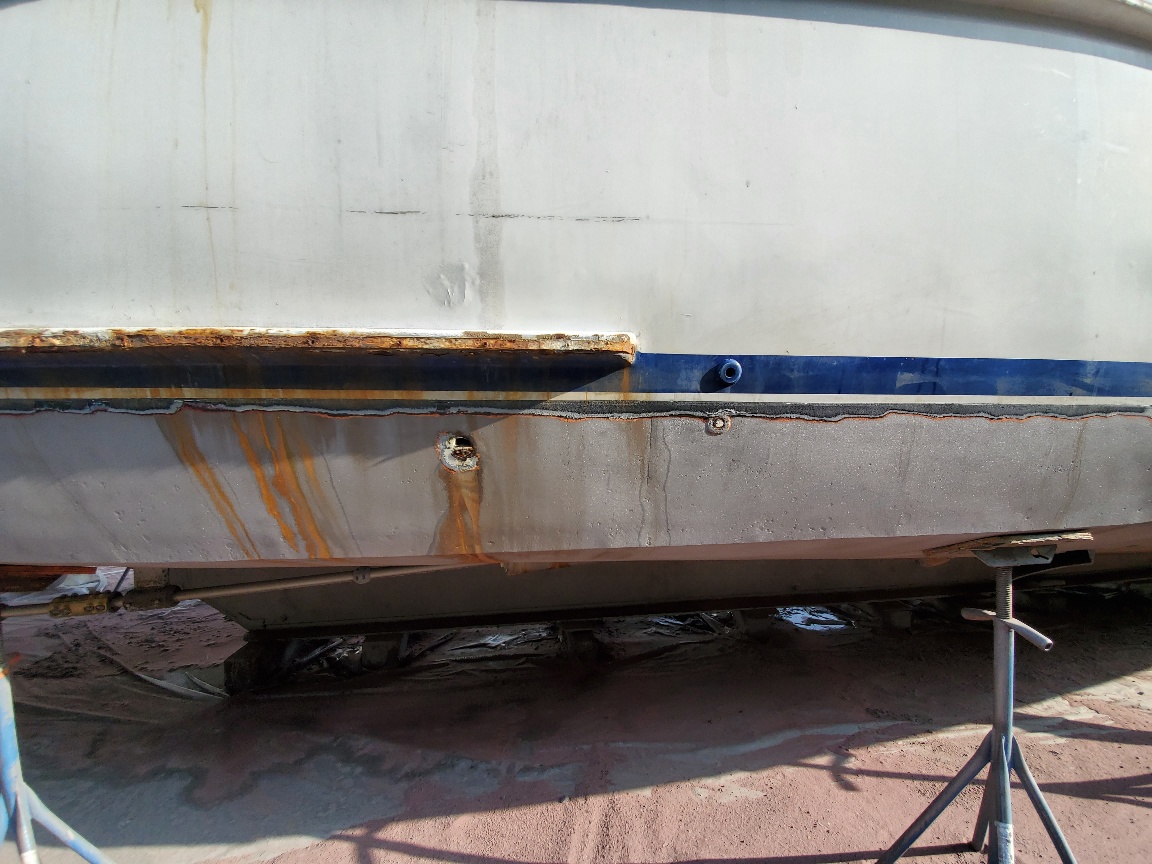
| The audio gauge showed this as a thinning plate. |
 |
| Plugged scupper and drains. |
 |
| This looks better. |
 |
| Pin holes like this become big holes. |
 |
| more plugged up drains |
 |
| I'm sure you've got the idea. |
 |
| Plywood was behind the port holes. |
 |
| engine room port holes needed some work. |
 |
| Then there is the rust! |
 |
| More rust! |
 |
| and more.... |
 |
| Cracking of the fairing. |
 |
| worn out port holes |
 |
| after sandblasting, the chipping begins...Please stop poking holes in my boat!!! |
 |
| So much for surface rust. |
 |
| Keep this spot in memory. |
 |
| Plugged up through hulls. |
 |
| In the shop ready for patching. |
 |
| The tape outlines where they would need to re-paint. |
 |
| Fairing the hull begins |
 |
| More fairing along the waterline. |
 |
| Remember that surface rust! |
 |
| more fairing and rust removal on the hull rub rail and strakes |
 |
| The port side faired better than the starboard side on the top sides. but not under the waterline. |
 |
| The first of many patches. |
 |
| more patches |
 |
| and just like that, the hole is gone |
 |
We are so happy we decided to do this.
|
When we saw all of the touchup areas on the top side hull, we simply made the decision to just repaint the entire boat. This turned out to be a great decision.
 |
| Prep work carried out prior to painting |
 |
| Ready to start bottom paint. |
As the yard continued to work on the paint prep, filling fairing and sanding, they were also working on the engine gauge project that I had given them. I sourced the gauges from Diesel Pro out of Florida and the end result is gauges that match and the old engine gauges are now in the engine room where I can monitor them while working in the engine room.
 |
| New gauges installed at the helm! |
 |
| Looks good I can't wait to see it in person. |
 |
| Old gauges in the engine room. |
 |
| I miss my engine room! |
With the engine gauges replaced and the mechanical work completed, focus turned back to the hull painting. The first step is to prep the hull for painting and clean it up. Then two coats of epoxy primer paint followed by two coats of antifouling paint, the first being red and the second being black. The reason for this is to determine when I need to re-apply another coat of bottom paint. When the red starts to show, it's time to apply another coat. We also decided to lift the waterline up and do away with the boot strip. By lifting the waterline, the ablative paint will be located in the zone where the hull, water and air all interact to enable algae growth. We hope this will allow for easier cleaning of that area. In the mean time, I had them service the fin stabilizer system prior to painting the bottom, this had not been done for 5 years and was well overdue.
 |
| Primer Coat x 2 |
 |
| Red Bottom Ablative Paint |
 |
| Black Bottom Ablative Paint |
With the bottom painted attention turned to the anchor roller fabrication and another project that I added to the list, a new transom access door. First the anchor roller, we switched the main CQR plow anchor to a Rocna Vulcan anchor that I over sized for the boat. Unfortunately the new anchor did not properly fit into the anchor roller that was already installed on the boat and did not deploy very easily. So one task that I had given the yard was to reconfigure the roller in order to make deployment and retrieval much easier.
The transom was never easily accessible until now. This project included making a guillotine gate that would allow us to access the boarding ladder without having to step over the bench seat and swing over the railing through a window. The boarding ladder would need to be modified and the canvas also would need adjustment to allow us to open half of the panel in order to use the gate.
With notes and photos going back and forth we came up with a plan.
 |
| The transom prior to modification. |
 |
| Sketching and design, this went back and forth a few times. |
 |
| Rough opening and handrail from ladder removed. |
 |
| Transom railing reinforced. |
 |
| Brackets installed with lifelines attached. |
 |
| Project complete, gate open. |
 |
| Webbing straps in place to keep Tank onboard. |
 |
| Gate Closed |
 |
| Another project completed. |
Finally it was time to paint the rest of the topsides, but I still had a few more projects in mind for them to wrap up. They had to wait to finish up a few other projects in the shop so that the dust would settle before they started all of their painting projects. In the meantime I had asked them to investigate some leaks that we had from the pilothouse rooftop.
 |
| Paint completed and trim installed! Port side. |
 |
| Starboard Side. |
 |
| Transom. |
Flybridge repairs continued on with the discovery of rotten wood structures, I decided to have them lift the entire flybridge structure and re-finish/repair the mounts to the rooftop.
 |
| The rotten wood and failed caulking. |
 |
| More of the same |
 |
| and more... |
 |
| Caulking removed but... |
 |
| Forget it, we're wasting time and money, time to lift the whole structure and see what we're dealing with. |
 |
| much better! |
 |
| All the wood has been replaced and sealed up. |
 |
| Sometimes it pays to just do the job right the first time around. |
As of now, we have added two more projects to the list which include extending the pilothouse roof so that we no longer have a canvas top covering the aft deck which will allow us to re-position the tender so that it is oriented fore and aft instead of athwartship as it currently sits. Along with this major project is another smaller modification to our boarding ladder that will allow for boarding alongside on a narrow finger pier.
For now, we wait for photos from the yard and for the Canadian border to open up.